1. Set up your memoQ TMS cloud
How to get here
From the my memoQ page
Go to the my memoQ page, and sign up for a my memoQ account.
After activating your account, sign in.
In the left-side menu, click memoQ TMS cloud.
Click the button that says Get started for free.
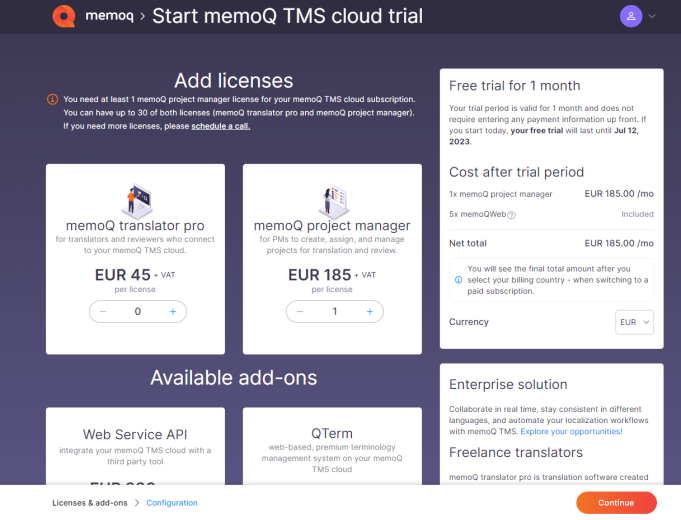
The Licenses & add-ons page opens:
Here you can:
In the Add licenses section - choose how many translator and project manager licenses you need.
In the Available add-ons section - add or remove the Web Service API and QTerm add-ons as needed.
In the Cost after trial period section - check the amount you need to pay for your current licenses after a trial month.
Confirm your choices - at the bottom of the page, click the Continue button.
The Configure memoQ TMS cloud page opens:
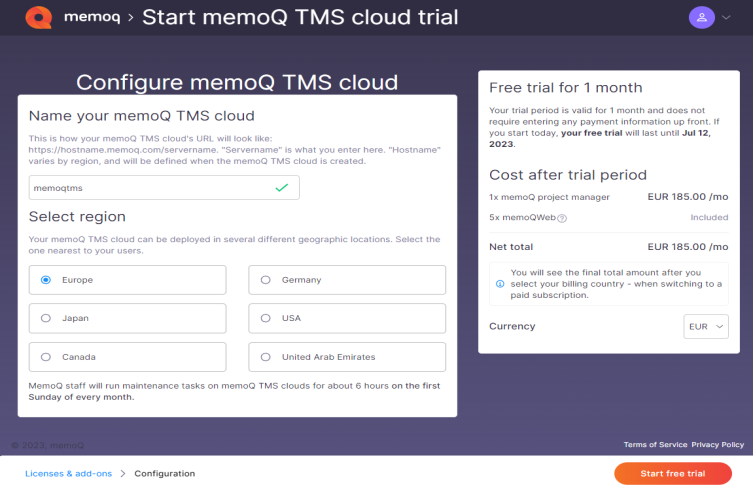
Here you can:
Enter a name for your memoQ TMS cloud and select your region.
Confirm your selection - at the bottom of the page, click the Start free trial button.
From the Start a trial page
Go to the Start a trial page.
The Licenses & add-ons page opens:
Here you can:
In the Add licenses section - choose how many translator and project manager licenses you need.
In the Available add-ons section - add or remove the Web Service API and QTerm add-ons as needed.
In the Cost after trial period section - check the amount you need to pay for your current licenses after a trial month.
Confirm your choices - at the bottom of the page, click the Continue button.
The Configure memoQ TMS cloud page opens:
Here you can:
Enter a name for your memoQ TMS cloud and select your region.
Confirm your selection - at the bottom of the page, click the Start free trial button.
On the Sign in or create your account page: Click Sign in if you already have an account, memoQ TMS cloud redirects you to the my memoQ page. If you don't have an account yet, click Create a new account.
The Create your account page opens. Fill in all your details and click Continue.
To finalize registration, go to your mail box and follow the steps mentioned in the confirmation email.
The memoQ TMS cloud page opens, letting you know that you are almost done.
Preparing your memoQ TMS cloud can take a few minutes.
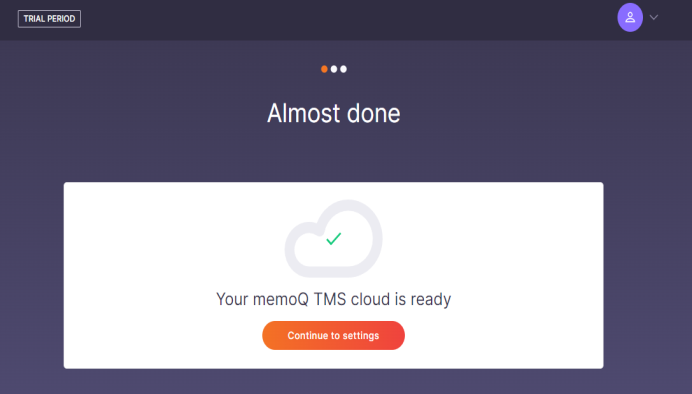
After your memoQ TMS cloud is ready, click the Continue to settings button.
You need to set two more things to start using your memoQ TMS cloud account:
Set your admin password - you need this password to log in to your memoQ TMS cloud, perform high-level administration tasks, and create more server users.
Schedule backup and updates - backup happens automatically and takes around 30 minutes. During the backup, the server is not available, so choose a time when nobody is using it. To confirm: Click Finish.
What can you do?
Your memoQ TMS cloud is now set up and you can start working.
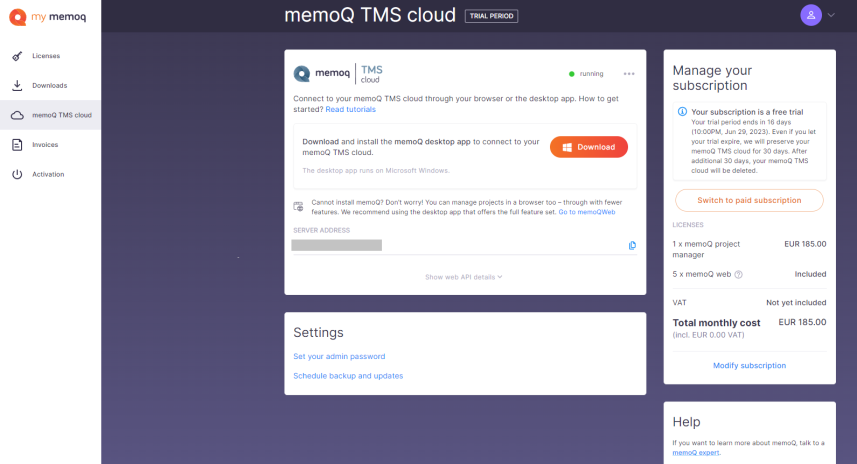
Here you can:
Under Manage your subscription - view selected licenses and total monthly cost after the trial period.
To go back to the Licenses & add-ons page and change selected subscription plan: Click Modify subscription.
To end your trial subscription and start paid subscription plan: Click Switch to paid subscription.
On the left panel, under my memoQ logo:
View your Licenses
 ,
,Go to Downloads
 page,
page,Go back to memoQ TMS cloud
 subscription page,
View your Invoices
 ,
,Add an Activation XML file
 .
.
On the central panel:
Click the View more
 icon to restart your memoQ TMS cloud.
Download and install the memoQ desktop app to connect to your memoQ TMS cloud.
Check or copy your server address.
View web API details.
Read tutorials about memoQ TMS cloud.
Under the Settings section - change your admin password or backups and updates time.
On the right, click the user icon to get access to:
Settings
 - here you can set your preferred page language, change your password, or the sign in email address.
Billing details
 - here you can change your contact data and billing information.
Sign out
 .
.
As for now, your memoQ TMS cloud subscription is a trial: You can use all memoQ TMS cloud features free of charge for 30 days. After that, you can resign from the subscription or you will be charged monthly for the licenses and add-ons you use.
Comments
0 comments
Please sign in to leave a comment.